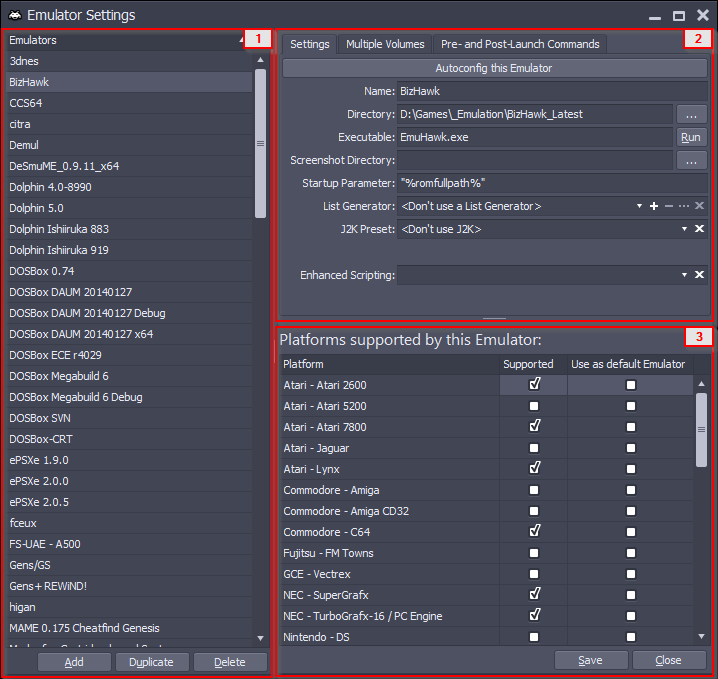
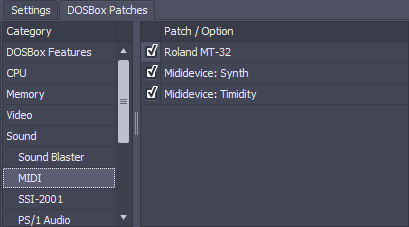
The Settings Tab provides the necessary settings for each emulator:
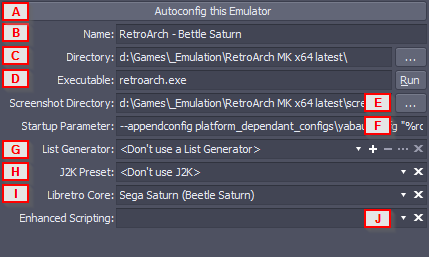
[A] Autoconfig this Emulator Button
When Metropolis Launcher detects the current emulator as a known emulator, you can press this button to automatically apply correct settings for it.
[B] Name
This is the display name of the emulator within Metropolis Launcher. It will be used in the emulators list (see above) as well as the launch menu of the Games & Emulation Main Screen.
You can add the same emulator under different names in Metropolis Launcher. This can be useful, if you need to start the emulator with different command line options.
[C] Directory
The directory, the emulator is installed in (will be auto-filled when using the  button, which lets you browse for an emulator. button, which lets you browse for an emulator.
[D] Executable
The emulator's executable (will be auto-filled when using the button, which lets you browse for an emulator.
Use the  button to simply run the emulator without any startup parameters. This can be useful if you want to do some settings within the emulator. button to simply run the emulator without any startup parameters. This can be useful if you want to do some settings within the emulator.
Note: Don't put any startup parameters in the Executable field, they should be specified in the Startup Parameter field.
[E] Screenshot Directory
Metropolis Launcher monitors screenshot directories in order to file screenshots taken in a session to the correct game entry. If the emulator saves screenshots in a certain directory, you can put the directory path in the field or use the button to browse it.
[F] Startup Parameter
All the necessary command line arguments for the emulator should be defined in this field. Read more about startup parameters here.
[G] List Generator
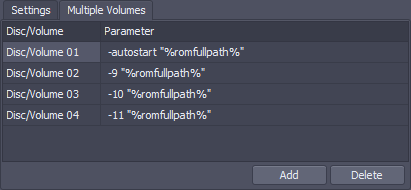
In order to feed multiple roms/cd images/diskette images to an emulator, some emulators support text-based list files as startup parameter.
The generated list files can be used as startup parameter for the emulator by using the variable %listfile%, which provides a filepath with .txt file ending. A user-defined file ending can be achieved by providing the variable %listfile.ext% where ext is the extension (e.g. %listfile.m3u% generates a file with .m3u extension).
Use the  button to select the list generator to be applied. button to select the list generator to be applied.
Use the  button to edit the currently selected list generator. button to edit the currently selected list generator.
Use the  button to add a new list generator. button to add a new list generator.
Use the  button to globally remove the currently selected list generator. button to globally remove the currently selected list generator.
[H] J2K Preset
If you use a J2K - A Joystick to Keyboard Mapper (get it from emulation-evolved.net) and you have set it up in the Settings, you can set the J2K preset to be used with the emulator here.
[I] Libretro Core
Note: This dropdown is only visible if you edit a RetroArch emulator.
Select the libretro core to be used in this dropdown. This way you can add RetroArch multiple times with multiple names to Metropolis Launcher and define different libretro cores to be used.
[J] Enhanced Scripting

If you don't want Metropolis Launcher to launch an emulator directly but to run a script, select the scripting engine from the Enhanced Scripting dropdown and browse / create a script with the Script File's buttons.
Read more about enhanced scripting here.
|