|
Metropolis Launcher is full of tabular representation of data. The biggest table within Metropolis Launcher is without any doubt the Games & Emulation Main Screen with all the games and their respective name, genres, developer, year etc. metadata as columns.
There are however numerous minor tables in dialogs (e.g. the list of games that a certain developer has contributed to in the Developer Info dialog).
Also, within the tabs on the Games & Emulation Main Screen there a some smaller tables (e.g. Technical Specs, Statistics, Staff etc.).
All these tables have common functionality, which will be described in this topic.
Note: Anything you set up with these tables (visibility, sequence and size of columns, sorting, sort order, filtering and grouping) will be saved when you close a dialog or exit Metropolis Launcher. When you re-open the table these settings will be restored.
Overview
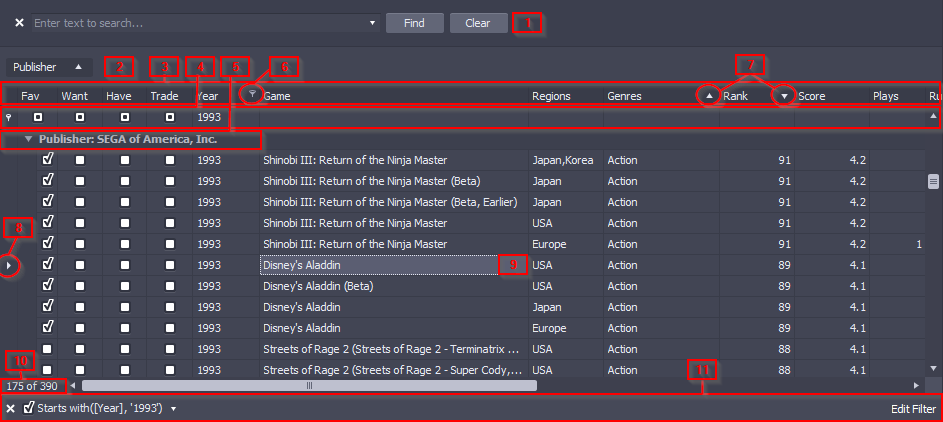
A table within Metropolis Launcher is made up of the following elements:
 [1] Find Panel [1] Find Panel
The Find Panel is accessible by pressing CTRL+F on the table or choosing the Show Find Panel menu item via Context Menu (right click) on the Table Header
|
 [2] Group Panel [2] Group Panel
The Group Panel contains all column headers which are used for grouping, their hierarchy as well as the sorting. You can access the Smart Tag on each column header there as well as a context menu (right click) allowing additional Full Collapse and Full Expand of the group rows.
|
 [3] Table Header with Column Headers, Smart Tag [6] and Sort Indicators [7] [3] Table Header with Column Headers, Smart Tag [6] and Sort Indicators [7]
The Table Header provides all the column headers for the table excluding those which are used for grouping and removed ones.
Click a column header in order to exlcusively sort by that column or reverse the sort order. Hold SHIFT while clicking a column header and the column will be added to the sorting columns. Hold CTRL and a column will be removed from the sorting columns.
When you hover over a column header, a smart tag appears on the right, click it to access filtering options.
|
 [4] Auto Filter Row [4] Auto Filter Row
The Auto Filter Row provides filter input elements for each column. In the screenshot above, there is a filter for the Year set to "1993" in it's auto filter input.
|
 [5] Group Row [5] Group Row
Each Group Row shows the current value of each grouped column. If you group by more than one column, the group rows will be nested.
|
 [8] Row Indicator [8] Row Indicator
The Row Indicator indicates the current row.
|
 [9] Active Cell [9] Active Cell
The Active Cell is highlighted with a different backround and dotted frame.
|
 [10] Row Info [10] Row Info
The Row Info tells you the total number of rows and the row number of the current row.
|
 [11] Filter Info [11] Filter Info
The Filter Info tells the currently applied filter. You can deactivate the whole filter by clicking the checkbox. You can remove the whole filter by clicking the X symbol. Click the filter itself in order to choose from previous filters. You can edit the filter by clicking Edit Filter on the right.
|
The column header's context menu
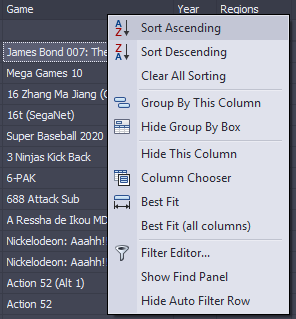
Menu Item
|
Function
|
Sort Ascending/Sort Descending
|
Enable Sorting and define the sort order of the current column
|
Clear All Sorting
|
Clear Sorting for all columns
|
Group By This Column
|
Add the column header to the Group By Box
|
Show/Hide Group By Box
|
Shows/Hides the Group By Box which enables re-arrangement of grouped columns and access to their column headers
|
Hide This Column
|
The column is removed from the table header
|
Column Chooser
|
Opens a small window containing all hidden column headers for drag&drop to the table header or the Group By Box
|
Best Fit
|
Measures the best width by header and content widths and applies it for the current column
|
Best Fit (all column)
|
Measures the best width by header and content widths and applies it for each column in the table header
|
Filter Editor...
|
Opens the Filter Editor
|
Show/Hide Find Panel
|
Shows/Hides the Find Panel which enables a search for any text in any field
|
Show/Hide Auto Filter Row
|
Shows/Hides the Auto Filter Row which enables specific filter inputs for each column in the table header
|
Column Visibility and Sequence
Column Sorting
Grouping
Grouping allows you to organize the data in a tree-like structure.
The Group By Box's context menu
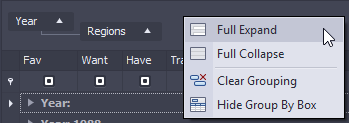
Menu Item
|
Function
|
Full Expand
|
Expand all group rows
|
Full Collapse
|
Collapse all group rows
|
Clear Grouping
|
Remove all columns from the Group By Box
|
Hide Group By Box
|
Get more vertical space by hiding the box
|
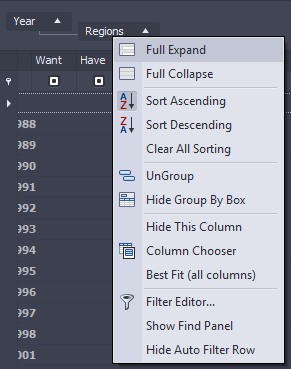
A grouped column header's context menu
You can access the context menu of a grouped column by right click on the column header in the Group By Box. The content is almost identical to the column header's context menu in the table header.
Search
Open the Find Panel by pressing CTRL+F or by accessing a column header's context menu (right click) and choosing the Show Find Panel menu item.
This table-wide search acts as a filter (the number of rows will be reduced to the ones that contain the searched term).
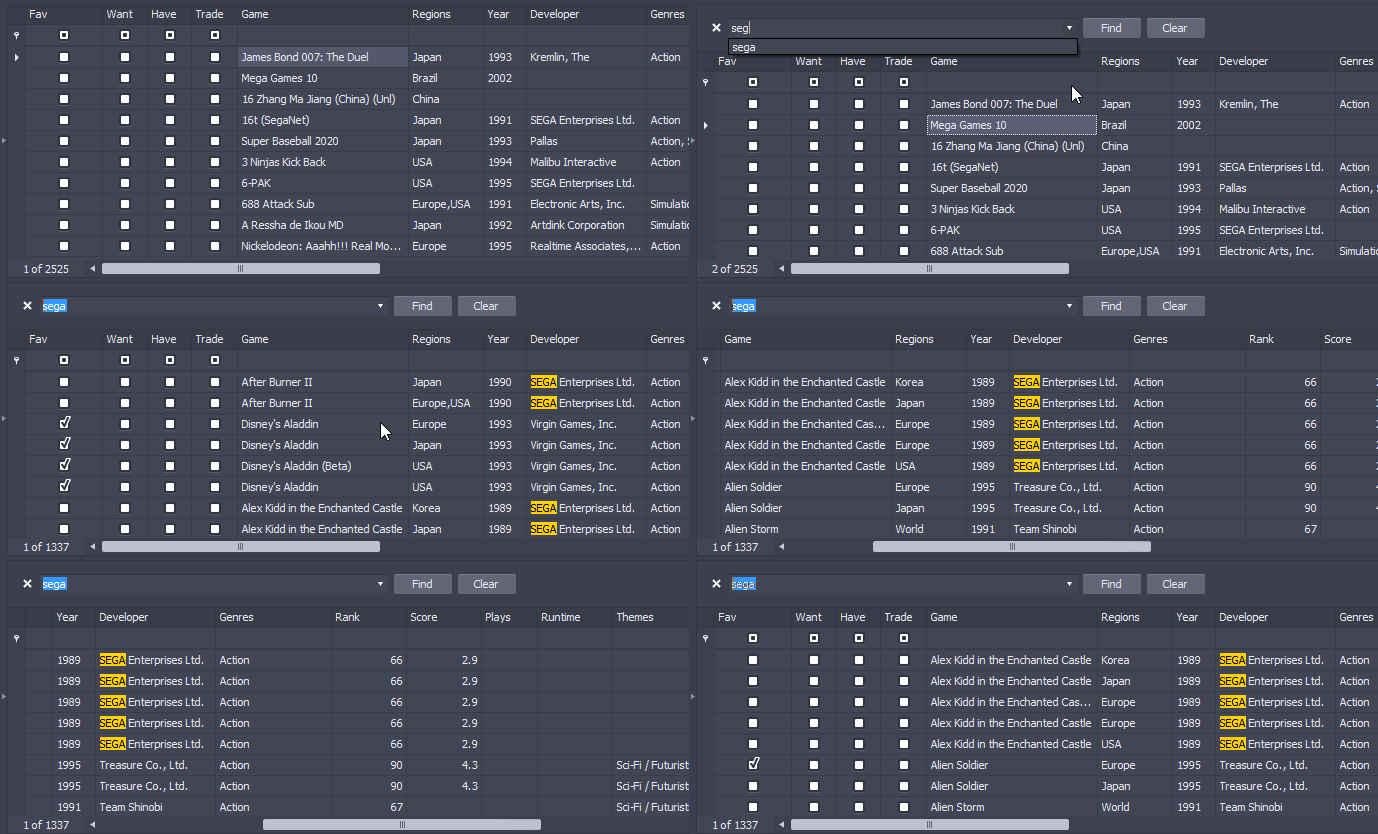
|
While you type, the next hit will be automatically selected. You can jump between hits by holding CTRL and pressing Up/Down cursor keys.
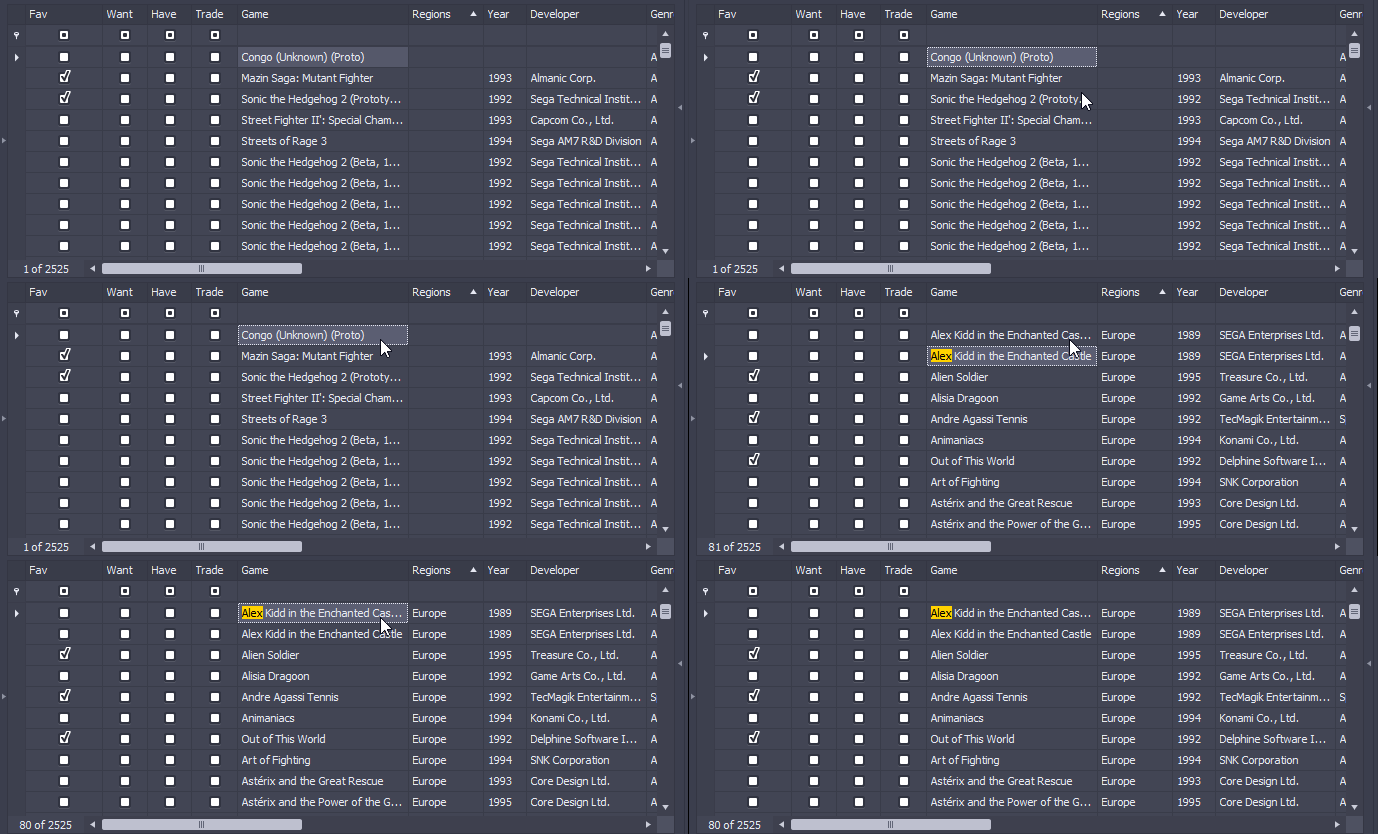
|
Filter
Metropolis Launcher provides many possibilities to filter data, here's how it's done:
The Auto Filter Row allows you to define filters for any column by typing a filter term. You can use "%" or "*" as the first character to apply the filter text to any occurrence within the data, else the data has to start with the filter term.
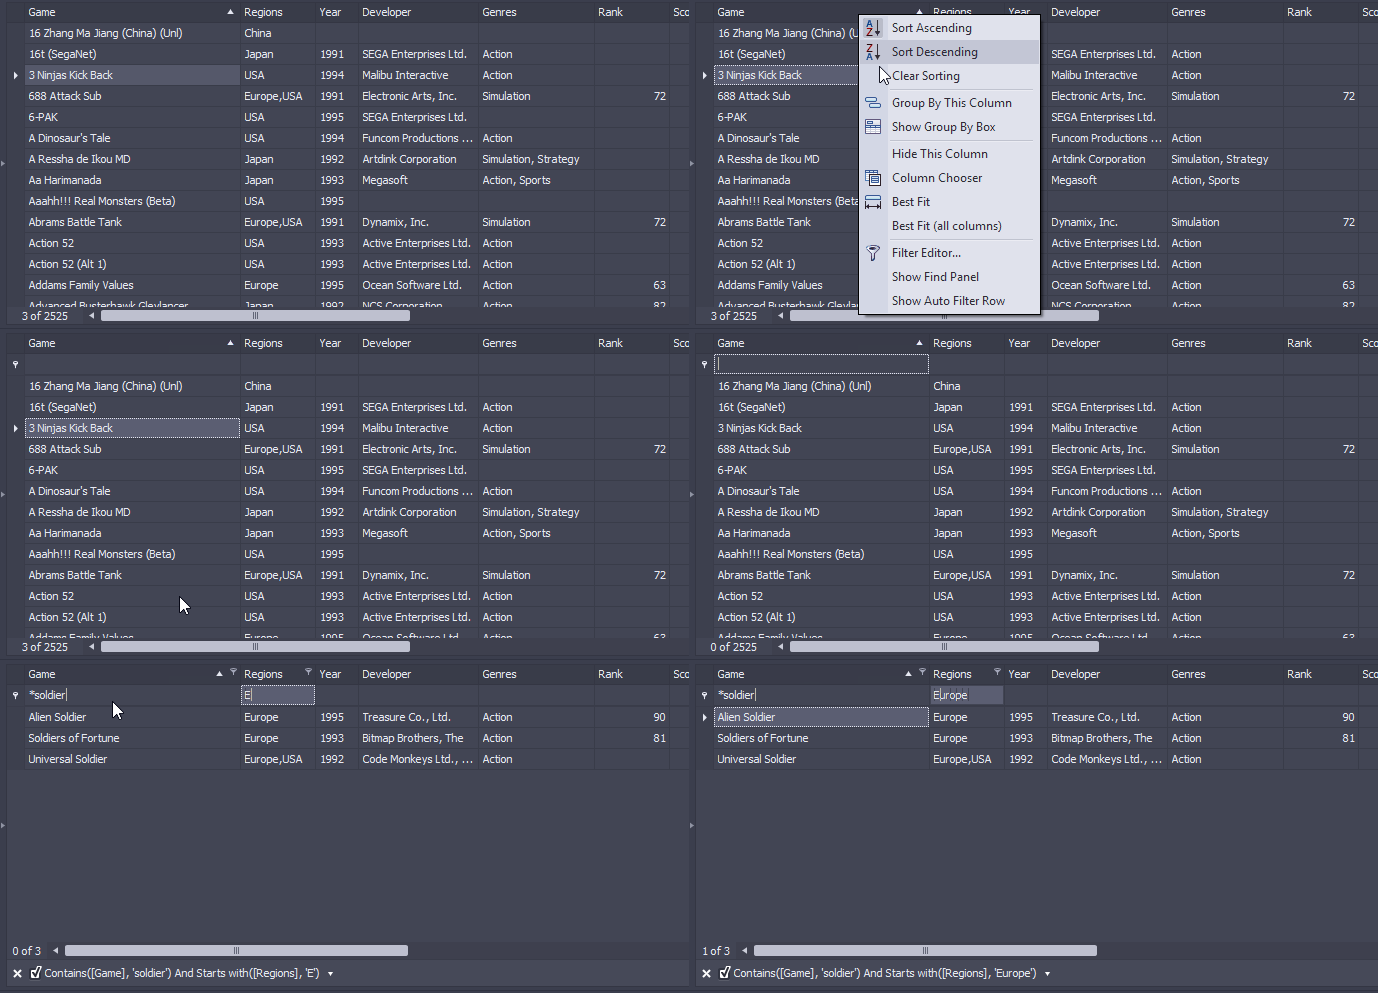
|
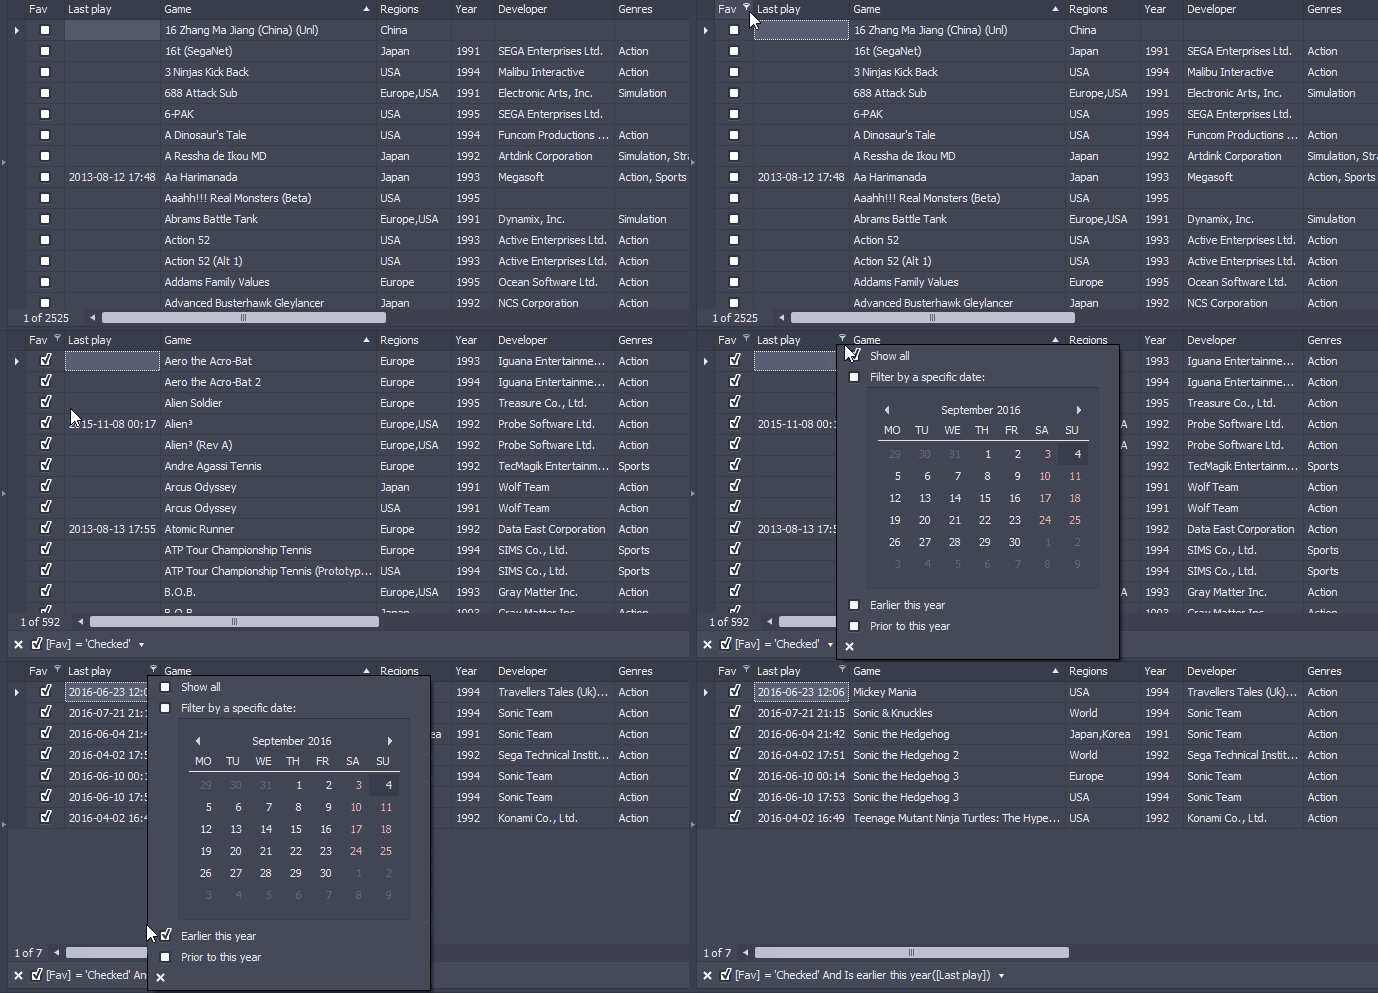
The Filter Button in each column header provides a Filter Dropdown List which lists all distinct values of the column data. If you click a value, the column will be filtered by that value. Additionally you can filter by Blanks and Non-Blanks.
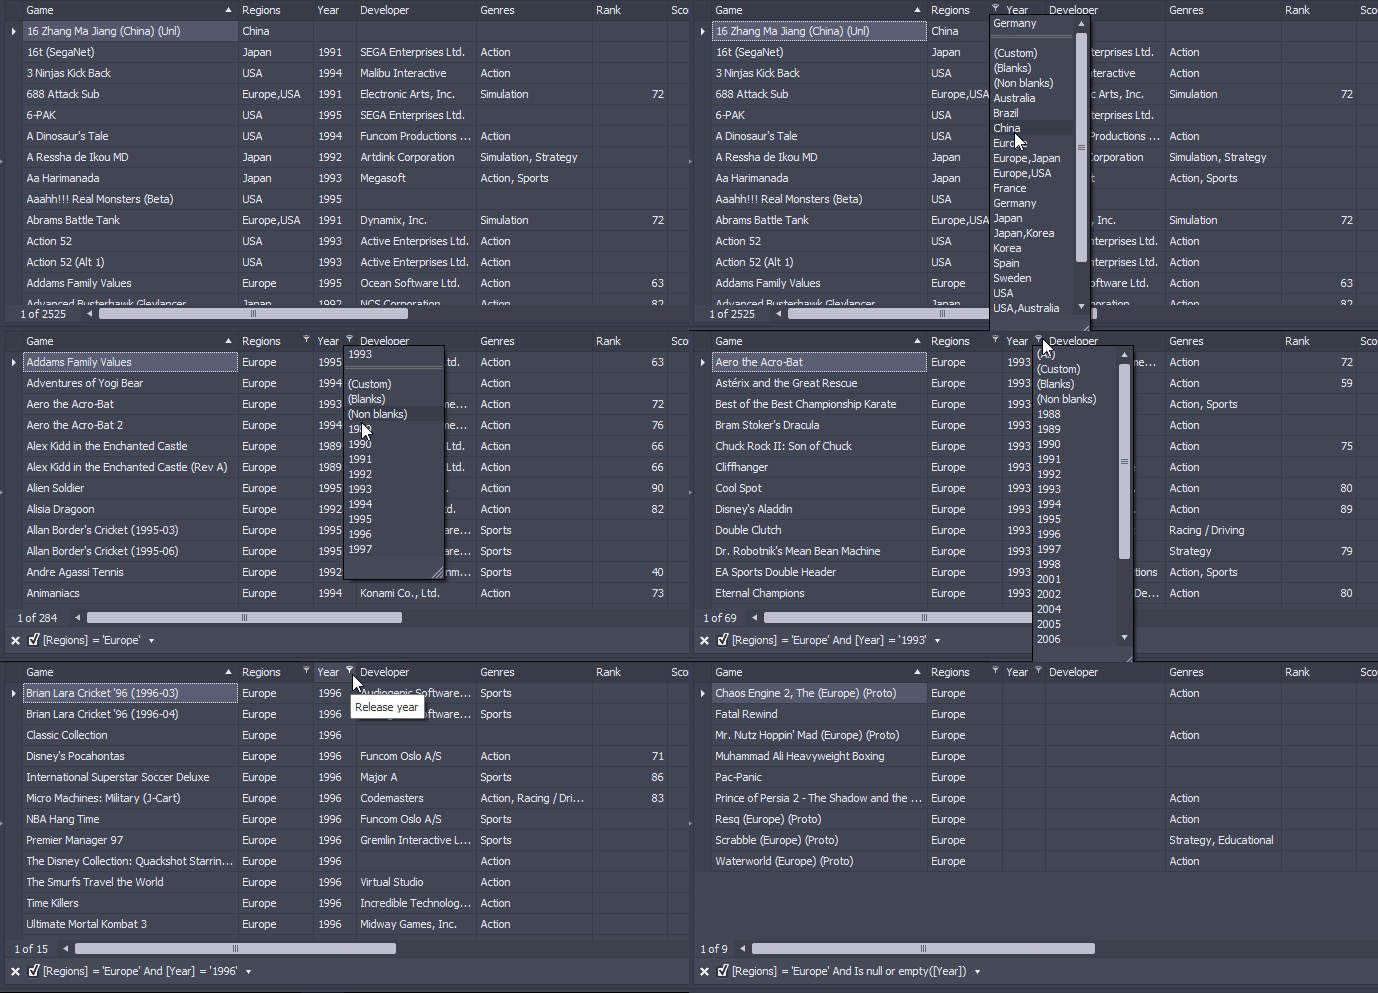
The Filter Dropdown List is aware of the underlying datatype. In this example we can easily filter all favourite titles that have been played earlier this year.
|
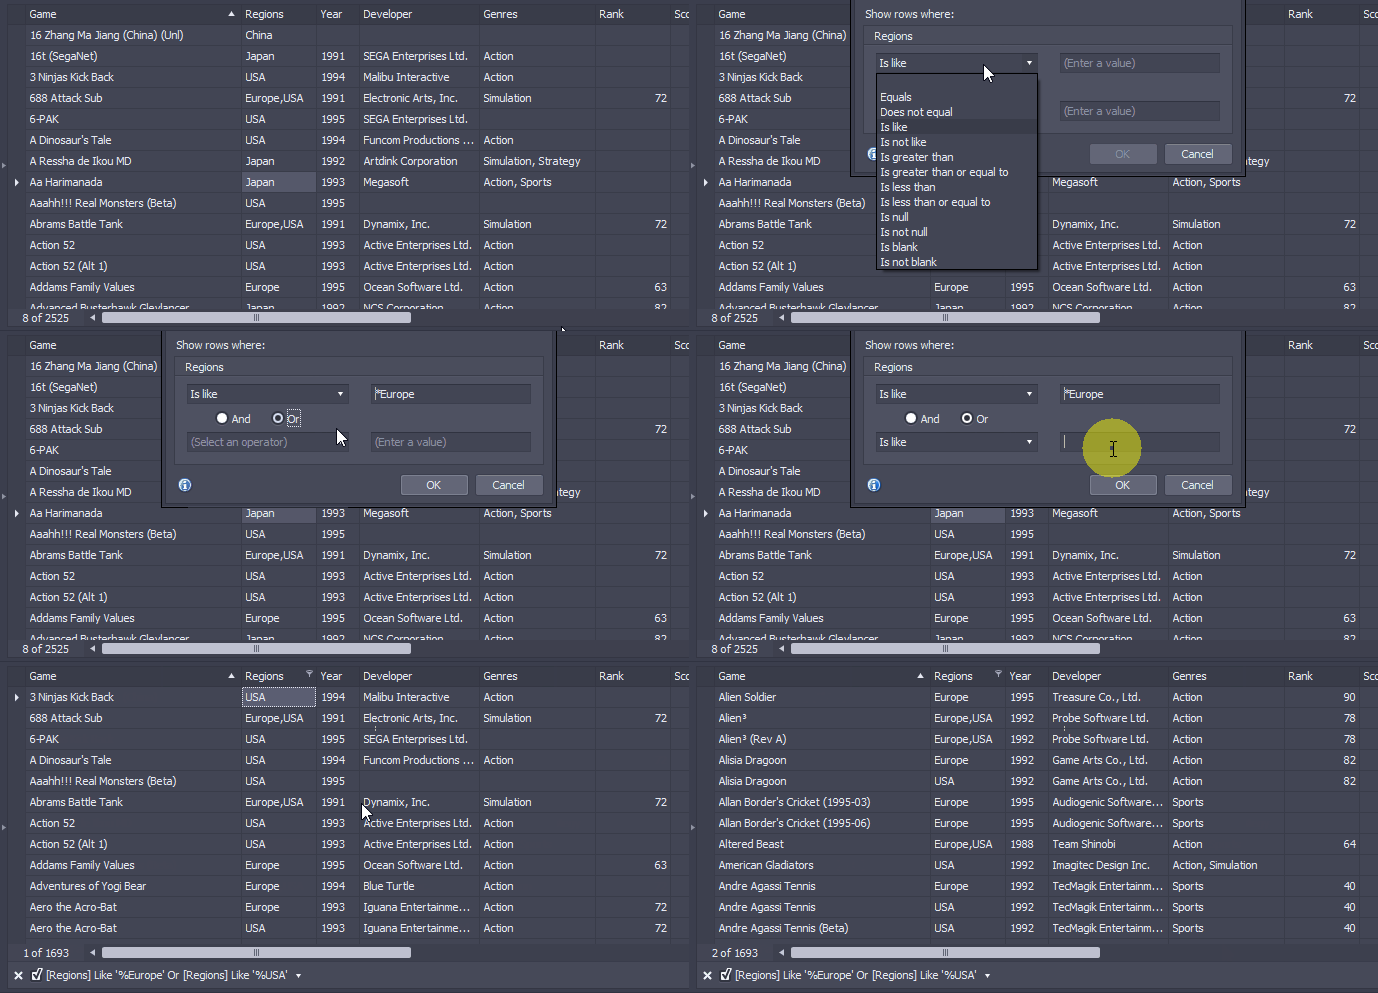
You can use the Custom Auto Filter to create more elaborate filters. In this example we want to view only games released in the Europe or USA region.
|
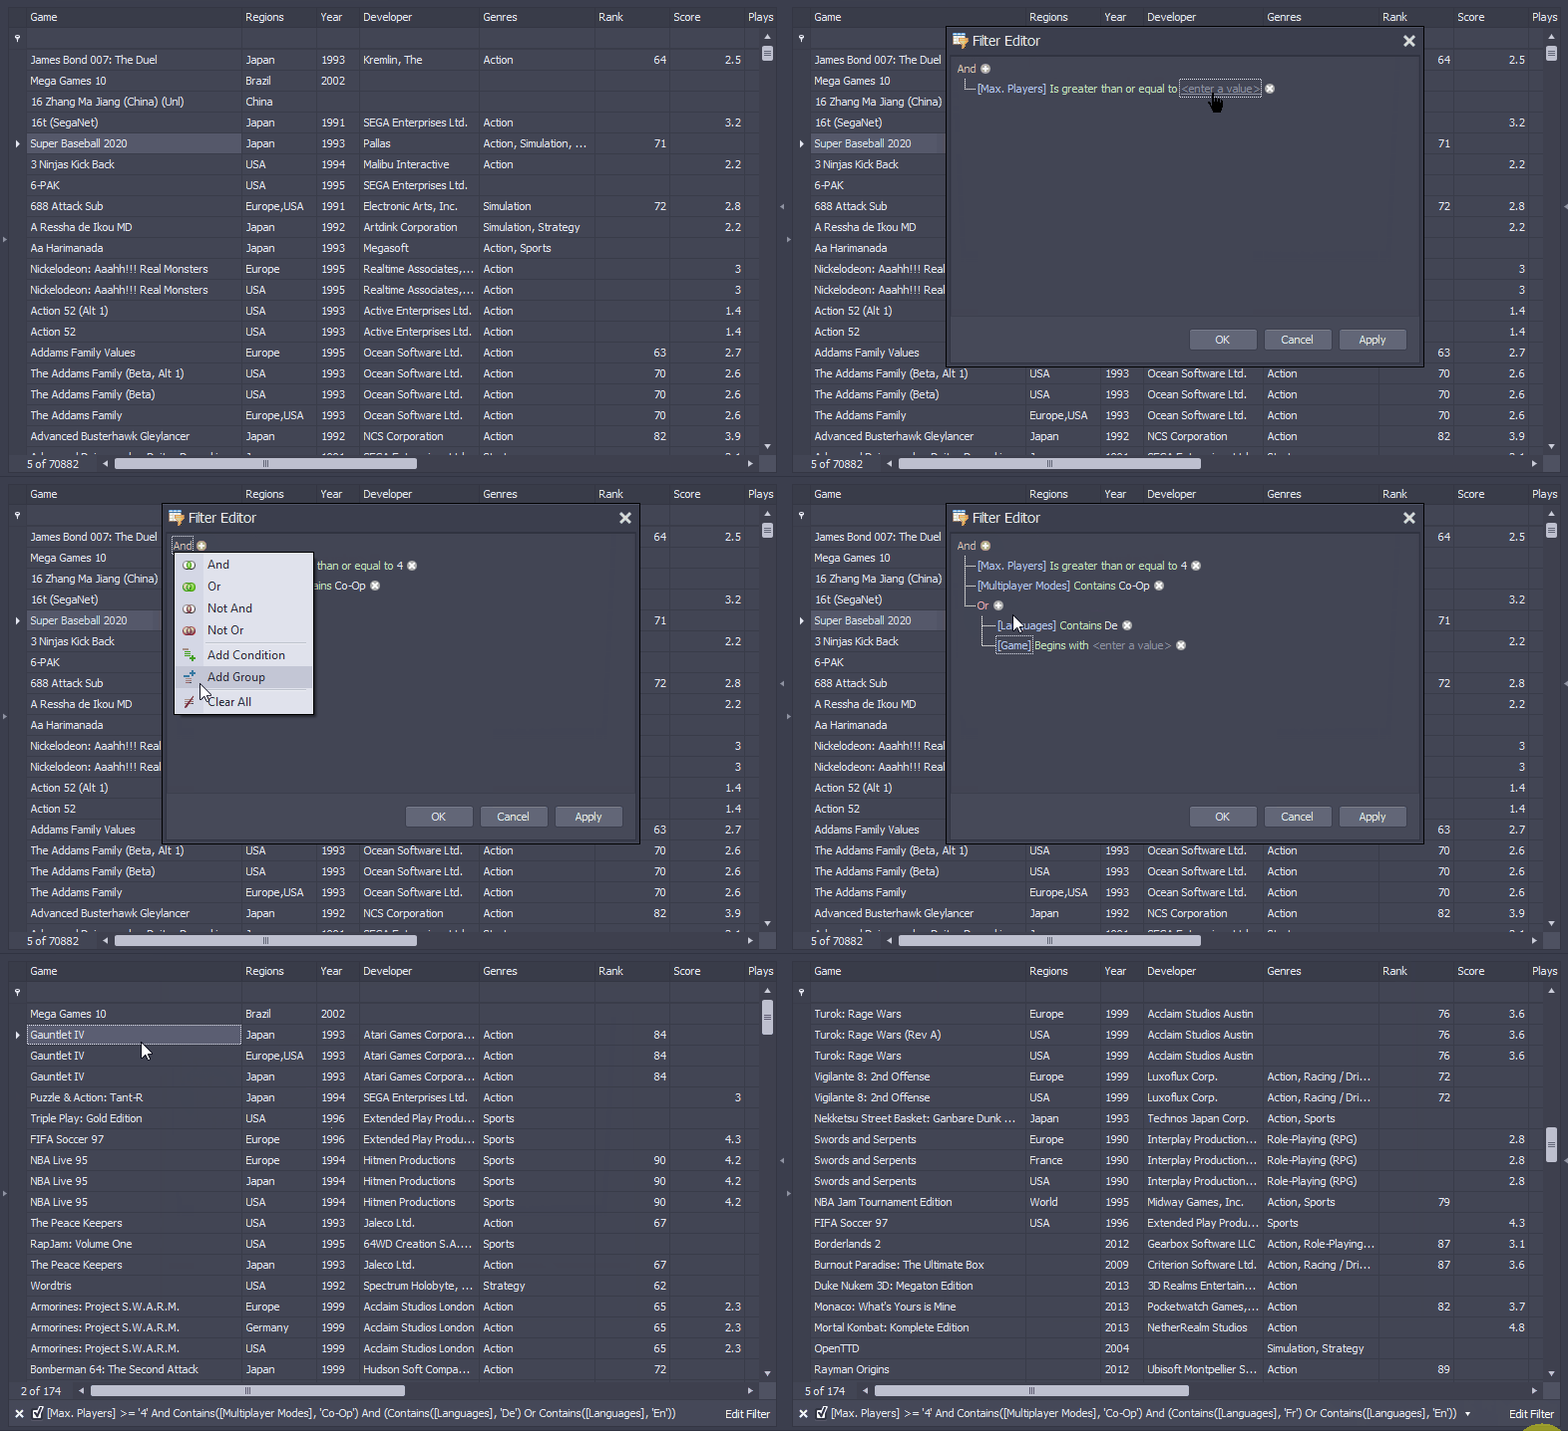
No matter which filter functionality you initially use (Auto Filter Row, Filter List, Custom Auto Filter), it all ends in a filter tree editable in the Filter Editor. You can however start right with the Filter Editor and create very precise filters.
In the following example, we'll create a filter for games that support:
| • | German (De) or English Language (En) |
After applying the filter, we re-visit the filter settings once again and change the German (De) language filter to French (Fr).
|
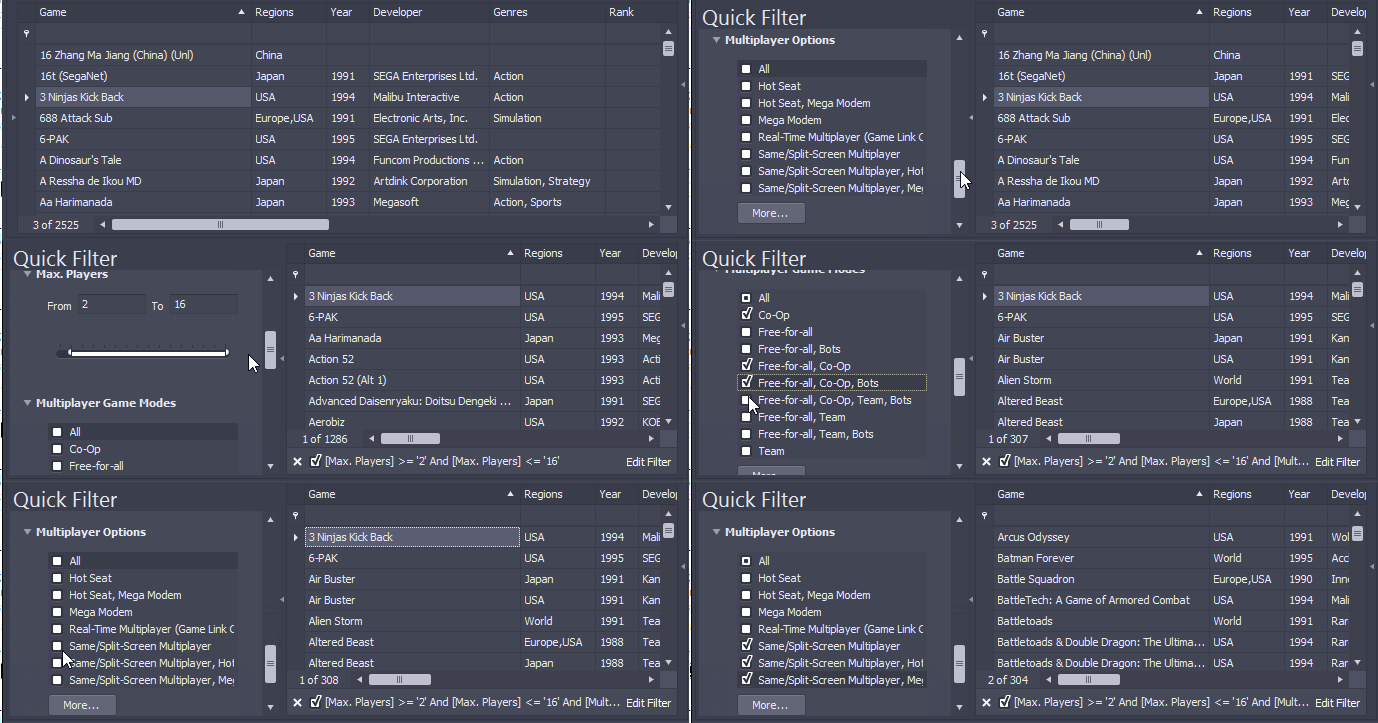
The Quick Filter is an easy access to filters for your games' data. Open the panel on the left, choose which data should be filtered and set the filter (multiple filter entries are possible).
In this example we'll filter games that:
| • | support 2 or more maximum number of players |
| • | Co-Op or Free-for-all multiplayer game mode |
| • | Same/Splitscreen multiplayer option |
Important: You should use the Quick Filter first if you want to use the Quick Filter in combination with the other filtering possibilities, because anything applied by other filters is not fed back to the Quick Filter options.
|
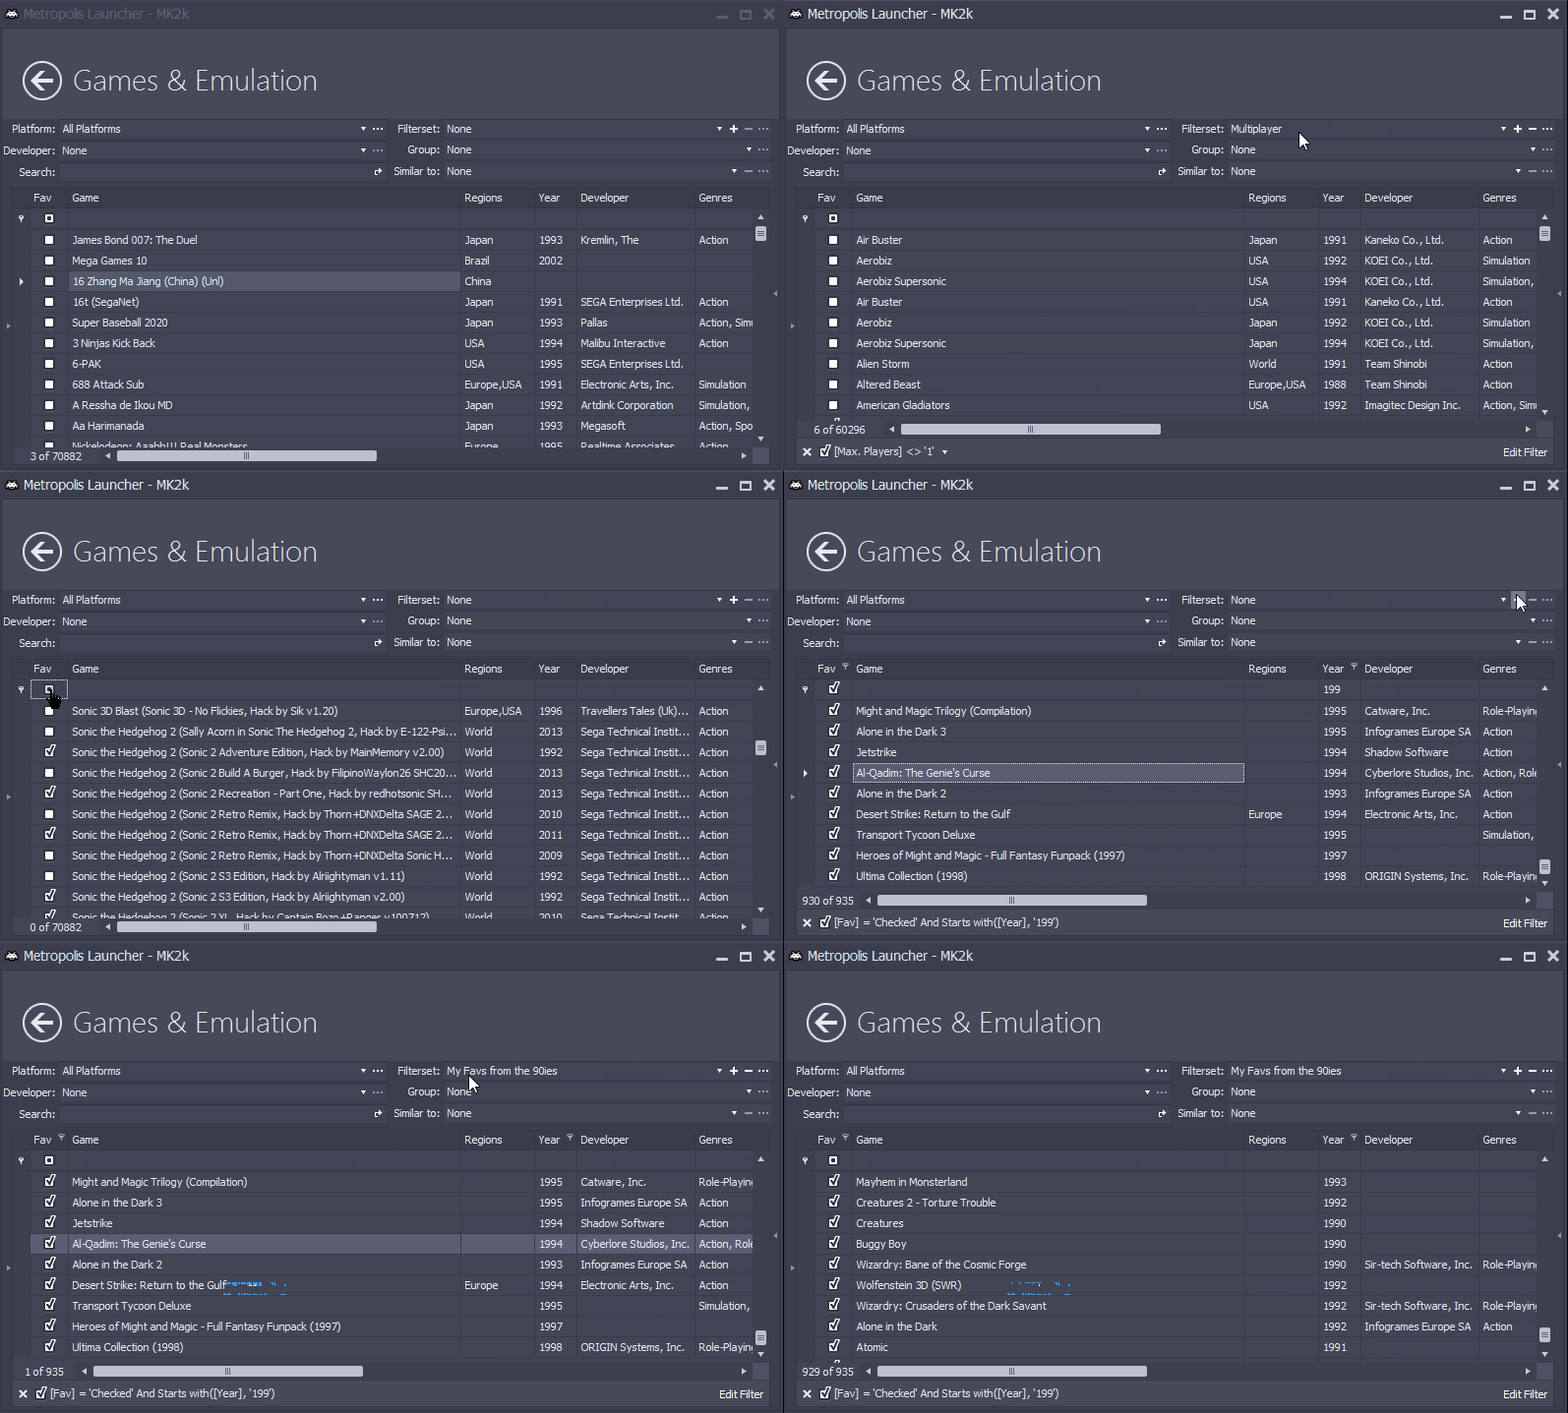
Creating filters can be a laborious task. For the Games & Emulation main screen, you can save and load your filters with the Filtersets collection.
In this example we have some already set-up Filtersets which get loaded by selection from the Filterset dropdown.
We'll create a new Filterset utilizing the Auto Filter Row with games that:
| • | are checked as favourite |
and save this Filterset as "My Favs from the 90ies".
|
|


